E-mail:
exexportmachinery@126.com
Tel:
+86-15256547590

Automatic die cutting machines are essential for efficient and precise production in the printing and packaging industry. However, like any sophisticated machinery, they can experience issues that impact performance and output quality. This comprehensive guide provides valuable insights into common problems, their causes, and effective troubleshooting techniques to keep your automatic die cutting machine running smoothly.
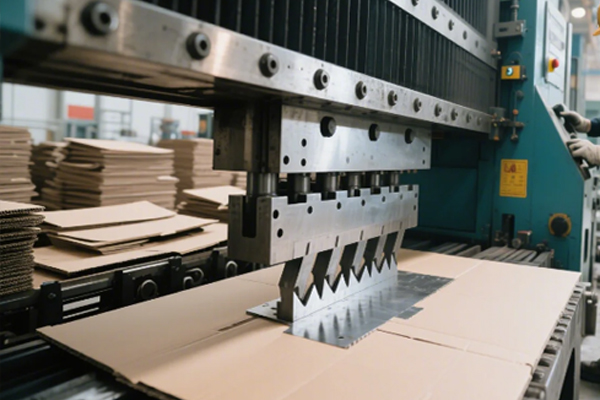
Before diving into troubleshooting, it's crucial to understand the basic components and functions of an automatic die cutting machine. These machines use a die, a specialized tool with sharp blades, to cut, crease, or score materials like paper, cardboard, and corrugated board. The process involves feeding the material into the machine, applying pressure with the die, and then removing the finished product.

Here's a breakdown of common issues encountered with automatic die cutting machines and practical solutions:
Problem: Some areas of the material are not fully cut through, resulting in remaining connections that require extra force to separate.
Possible Causes:
Insufficient Cutting Pressure: The pressure system of the die-cutting machine may not be properly adjusted or calibrated, leading to uneven pressure distribution on the material, resulting in incomplete cuts.
Blade Wear: Continuous use over time causes wear or deformation of the cutting blade, reducing its sharpness and making it unable to effectively penetrate and cut the material.
Uneven Cutting Plate or Cushion: Prolonged pressure exposure causes localized indentations or deformations in the cutting plate or cushion, leading to uneven force distribution during cutting, affecting cutting quality and accuracy.
Paper Thickness Variations: Discrepancies between the material specifications and the original design, resulting in an inability to effectively penetrate and cut the material.
Solutions:
Adjust Cutting Pressure: Increase the cutting pressure gradually, ensuring it is evenly distributed across the material. Consult your machine's manual for optimal pressure settings.
Replace or Sharpen Blades: Regularly inspect the cutting blades for wear and tear. 4 Replace dull or damaged blades to maintain cutting precision.
Replace Cutting Plate or Cushion: If the cutting plate or cushion is uneven, replace it to ensure uniform pressure distribution.
Verify Material Specifications: Ensure the material being cut matches the specifications for the die and machine settings.
Problem: The cut or creased areas are not aligned correctly on the material.
Possible Causes:
Inaccurate Paper Positioning: The automatic feeding system may have mechanical wear or electronic control deviations, causing misalignment in the positioning system and affecting paper feeding accuracy.
Machine Miscalibration: Errors during die-cutting equipment installation or mechanical shifts over prolonged use may lead to misalignment between the die and reference position.
Paper Size Variations: Temperature and humidity fluctuations in the production environment can cause uneven shrinkage or expansion of paper materials, resulting in positioning errors during processing.
Solutions
Check Paper Guides and Sensors: Ensure paper guides are properly aligned and sensors are functioning correctly to ensure accurate paper feeding.
Recalibrate the Machine: Follow the manufacturer's instructions to recalibrate the machine and ensure the die is correctly aligned with the material.
Control Environmental Factors: Maintain a stable temperature and humidity in the production environment to minimize paper size variations.
Problem: Creases are either too deep, too shallow, or not in the correct location.
Possible Causes:
Improper Gap Between Creasing Rule and Counterplate: If the gap is too large, the creasing pressure is insufficient, failing to create a clear fold line. If the gap is too small, excessive compression may damage or tear the paper surface.
Paper Thickness Variations: If creasing parameters are not adjusted in real time based on actual paper thickness, inconsistent creasing depths may occur, affecting product uniformity and processing quality.
Blade Wear: Over time, creasing blades may wear, deform, or become dull, preventing them from forming ideal crease lines on the paper surface.
Solutions:
Adjust Creasing Pressure: Fine-tune the creasing pressure to achieve the desired crease depth without damaging the material.
Adjust gap between creasing rule and counterplate: Adjust the gap between creasing rule and counterplate based on the thickness of the material.
Replace Creasing Blades: Regularly inspect and replace worn creasing blades to ensure clean and accurate creases.
Problem: The material gets stuck in the machine, causing production delays and potential damage.
Possible Causes:
Incorrect Material Settings: Using the wrong material settings, such as feed rate or pressure, can cause the material to jam.
Worn or Damaged Rollers: Worn or damaged rollers can prevent the material from feeding smoothly.
Static Electricity: Static electricity can cause the material to stick together, leading to jams.
Solutions:
Verify Material Settings: Double-check the material settings in the machine's control panel and adjust them as needed.
Clean or Replace Rollers: Clean the rollers regularly to remove any debris or buildup. Replace worn or damaged rollers to ensure smooth material feeding.
Reduce Static Electricity: Use anti-static sprays or devices to minimize static electricity in the production environment.
Problem: The grippers lose their elasticity and cannot hold the paper.
Possible Causes:
Paper thickness changes greatly: During the use of the automatic die-cutting machine, if the thickness of the paper changes greatly, it will easily cause the grippers to lose their elasticity and cannot hold the paper.
Solutions:
Adjust the gripper: The gripper should be adjusted in time to make it pull evenly on the paper.
Problem: The cutting edge is not lubricated, fluffed, and burst during die-cutting.
Possible Causes:
Layout pressure of the automatic die cutting machine is not well adjusted: If this adjustment is not good, the cutting edge will not be lubricated, fluffed, and burst during die-cutting.
Solutions:
Adjust the layout pressure: The pressure adjustment of the layout should be gradually increased from small to large. It should be small and not large. To make the pressure received by each layout the same, to get a suitable pressure, you should press out the proofs for inspection, and then continue to adjust.

Regular maintenance is crucial for preventing problems and extending the life of your automatic die cutting machine:
Regular Cleaning: Clean the machine daily to remove dust, debris, and paper scraps.
Lubrication: Lubricate moving parts regularly according to the manufacturer's recommendations.
Inspection: Inspect the machine regularly for worn or damaged parts and replace them promptly.
Training: Ensure operators are properly trained on the machine's operation and maintenance procedures.
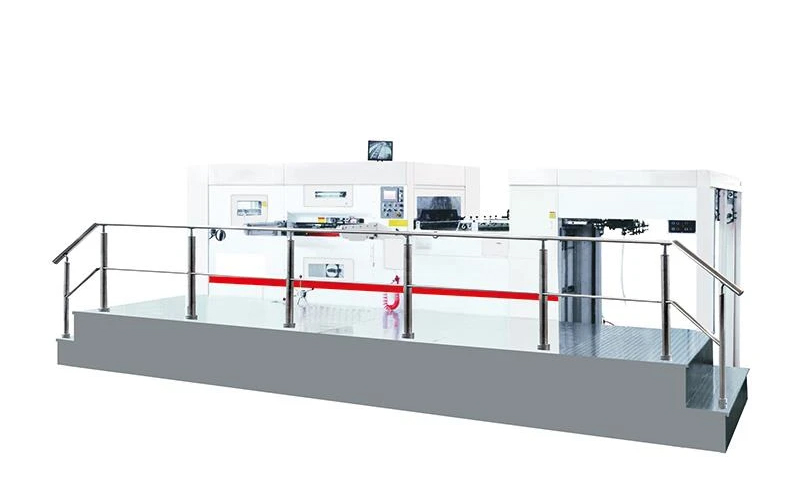
EX. Export is a professional manufacturer and supplier of printing and packaging equipment, including high-quality automatic die cutting machines. Our machines are designed for longevity, quality, and modernization, incorporating innovative and advanced technologies. We offer comprehensive pre-sales service and efficient online support for after-sales service. EX. Export provides a 12-month quality guarantee, and program updates are always provided free for the machine's life.
If you are looking for a reliable and efficient automatic die cutting machine factory, contact EX. Export today to discuss your specific needs. Our team of experts is ready to provide a detailed quote and help you find the perfect solution for your business.

Hello, I am Valerie Xu. With over a decade in the global printing and packaging industry, I connect clients with top-tier Chinese manufacturing solutions. My expertise allows me to source, customize, and deliver high-performance equipment worldwide.
I turn your machinery investment into a strategic advantage by identifying the best equipment for your needs and budget. My services include:
✅ Pre-Sales: Consultations, factory audits, and equipment matching.
✅ After-Sales: Installation, training, maintenance, and spare parts.
I streamline purchasing, mitigate risks, and optimize costs, ensuring a trusted partnership for success. Let’s elevate your operations with precision-engineered solutions.